Blender is required to add costumes.
The latest version uses Blender 2.92.0.
Follow the steps below to add a costume.
- Open the .blend file located at:
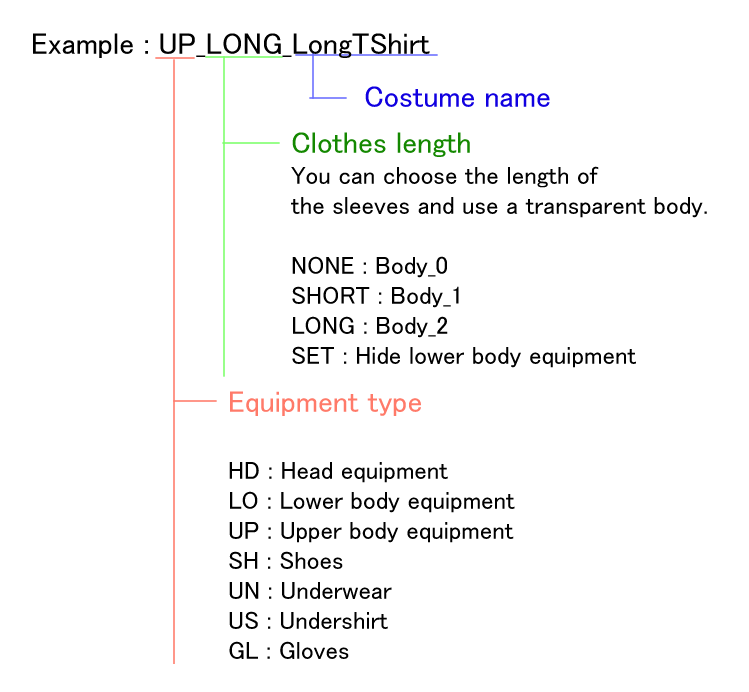
>CustomizableAnimeGirl\Models\Blender\CustomizableAnimeGirl.zip - Create or add a new outfit and name it according to the following naming convention.
- Set the armature for the added costume.
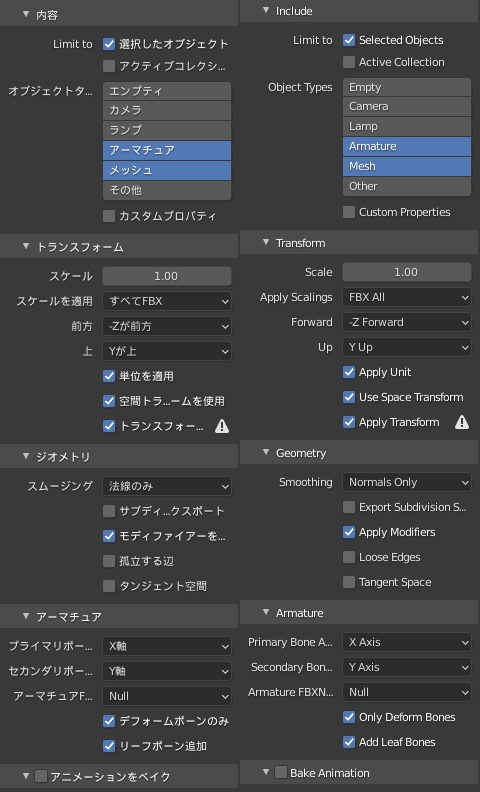
You can easily set it by transferring the weight from Body. - Export as an FBX file with the following settings.
- In Unity, Copy the FBX file to the following location:
>CustomizableAnimeGirl/Models/FBX/(UnityChan|URP) - Select the FBX file you just added and change Rig to Humanoid.
- Change the Avatar Definition
“CopyFrom Other Avatar -> Customizable Anime Girl Avatar” - Uncheck Animation and Materials.
- Select “CustomizableAnimeGirl” in scene, and add a new FBX file to the CustomizeManager FBX list.
- Press “Auto Detect Meshes”.
- If it is prefabricated, click ApplyAll in Overrides to apply the changes to the prefab.
- Complete